
How to Make Writing Centers Work for You and for Students
Writing Centers can be a perfect complement to your language arts framework, whether you use a workshop model for reading and/or writing or a rotation structure like Daily 5. If you want students to be working on literacy-based tasks independently or with partners, writing centers or writing stations have the potential to be a great fit.
However, keeping the writing tasks fresh and engaging within those centers can be time consuming and downright draining, and therefore they often become abandoned by both students and teacher.
I had tried lots of things that started out with promise but became stale or required too much of my time. I wanted writing activities that:
- only needed to be introduced once before students could do them independently.
- kept students' interest and engagement time after time.
- allowed students to practice a variety of writing forms.
- was easy for me to manage and keep fresh.
With the four key motivations above as the driving force, I started creating my Keep It Fresh! Writing Centers.

Having a total of 15 unique writing centers now means plenty of variety in writing forms. And within each and every center are simple built-in methods to, well, keep it fresh!
LET'S TOUR A WRITING CENTER
Come with me on a little tour of one of my writing centers, called Writing Battles, to see how the centers are set up.

I've chosen to use a folder system to "house" each writing center. This makes each one portable: students can take it back to their seat or work with a partner at a quiet place in the room.

In Writing Battles, students practice persuasive writing. I write the battle topic (e.g. "Cookies vs. Cake: which is better?") on the sheet protector with a wet-erase marker.

Simple, clear instructions guide students through the writing activity. They use a planner from the folder's left pocket to develop an opinion, and the writing tip cards can be used for student-friendly ways to improve their writing.

Students write their persuasive essay with the aim of convincing their classmates that one battle topic is better than the other.
A BIG VARIETY OF ENGAGING WRITING ACTIVITIES
I've spent a lot of time crafting writing tasks that are engaging to students, to spark their creativity and motivate them to write. Here is a peek at a few more of the writing centers:

In Choose Your Chapters, students write a short, three-chapter fictional narrative. They use the given "chapter chart" to choose the titles of their three chapters, thereby instantly creating an outline for their story!

In Character Scrapbooks, students develop a character to use in their own future writing through the creation of a scrapbook that showcases their new character.

In Object Mash-Ups, students choose two objects from a category list and combine them into one. They write a descriptive paragraph and draw a diagram about their mash-up.

In One-Prop Skits, students work with a partner to write a script for a short skit or play, featuring one (and only one) assigned prop. The given prop, chosen by you, is something readily available like a ruler or paper plate.
Below is a quick list of all 15 of my Keep It Fresh! Writing Centers, highlighting all the different forms of writing that are featured.

EASY TO MANAGE, EASY TO KEEP FRESH
I like to keep a teacher binder with all the topic lists and master copies of the planners and papers.

For a particular week, I grab a handful of writing center folders to be available for students. I quickly change out the topic for each center using the extensive topic lists. Then I just make sure each pocket is loaded with enough student copies, and they're ready to go for the week.

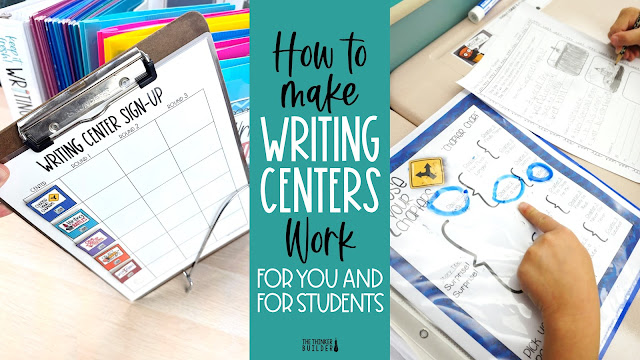
I place that week's center folders into a file-sorter organizer for students to access.
My last step is to attach the coordinating center-tags to our laminated sign-up sheet. The tags have Velcro on the back to make it easy to switch out.

Each day, students use a dry-erase marker to sign-up for one of the available writing center folders. At the end of the day, we can simply erase the sign-up sheet so it's ready for the next day.

After a week or two, depending on what is required of students (for example, maybe I use the Student Contract to require two completed writing center pieces in a given week), I carve out a few minutes for students to share their writing with the class, or we do a gallery walk for students to read of few of their classmates' finished pieces (hello, peer accountability!).

Students love sharing their pieces with their classmates, and I can quickly record completion grades. If I need more official accountability, I can use the Peer Review Forms or Student/Teacher Scoresheets.
Switching to different center folders for the next week, or revisiting previous ones but with new topics, always gives students a fun jolt of excitement for their writing time!
Click the image below to see my Keep It Fresh! Writing Centers Bundle in my TPT shop!
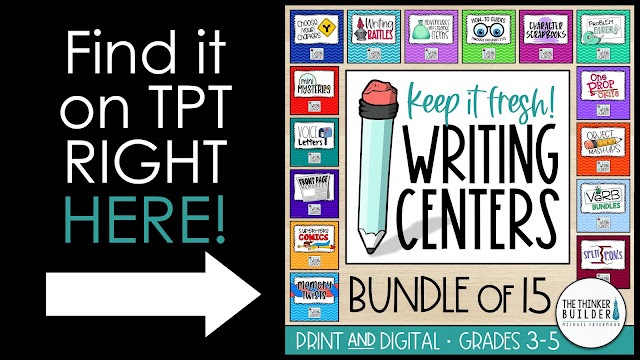
The bundle comes with all 15 of my writing centers, in both printable and digital (Google Slides) formats, plus the "Accessory Pack" filled with organization and management tools (like the sign-up sheets, center tags, and accountability forms).
You can also try out my free writing center, Memory Twists, shown below:

Let's get your students engaged in meaningful, creative writing practice, and let's do it with a system designed to run smoothly and efficiently for you!
